
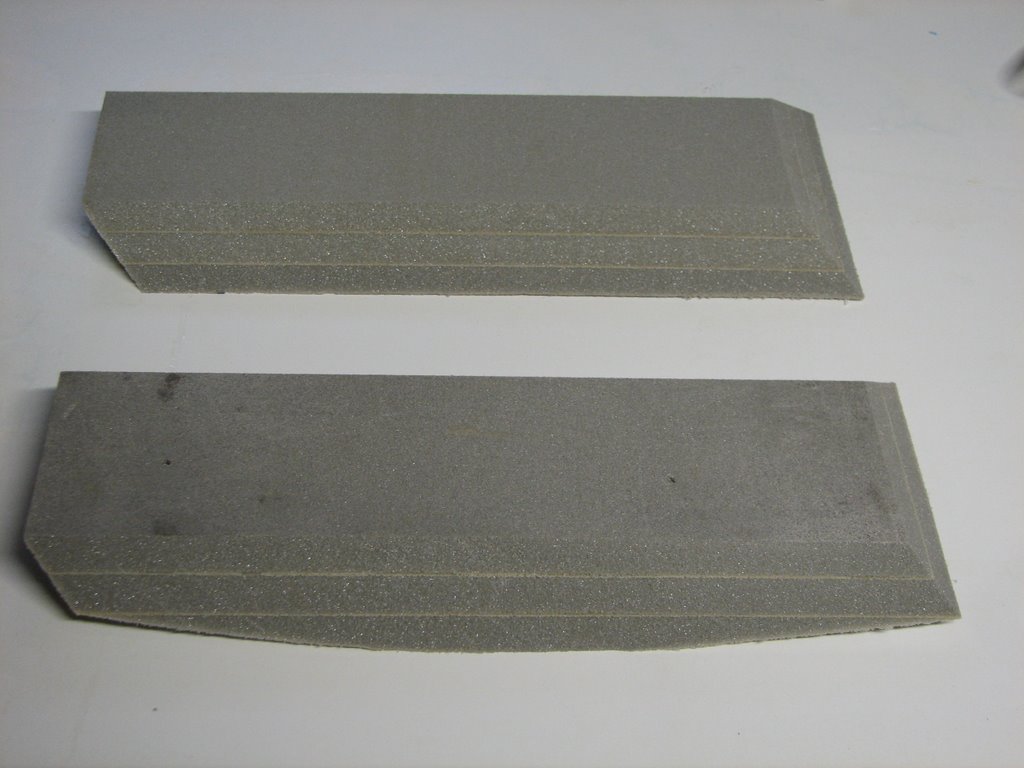
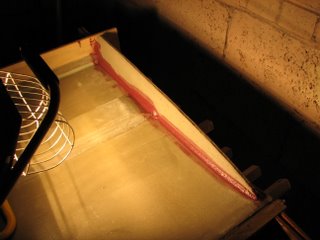
The laminating went well a week or so ago and I have finally plucked up the courage make the centre cut to create the two required parts. I simply used my jig saw with a blade for cutting metal and you can see the results above and below.
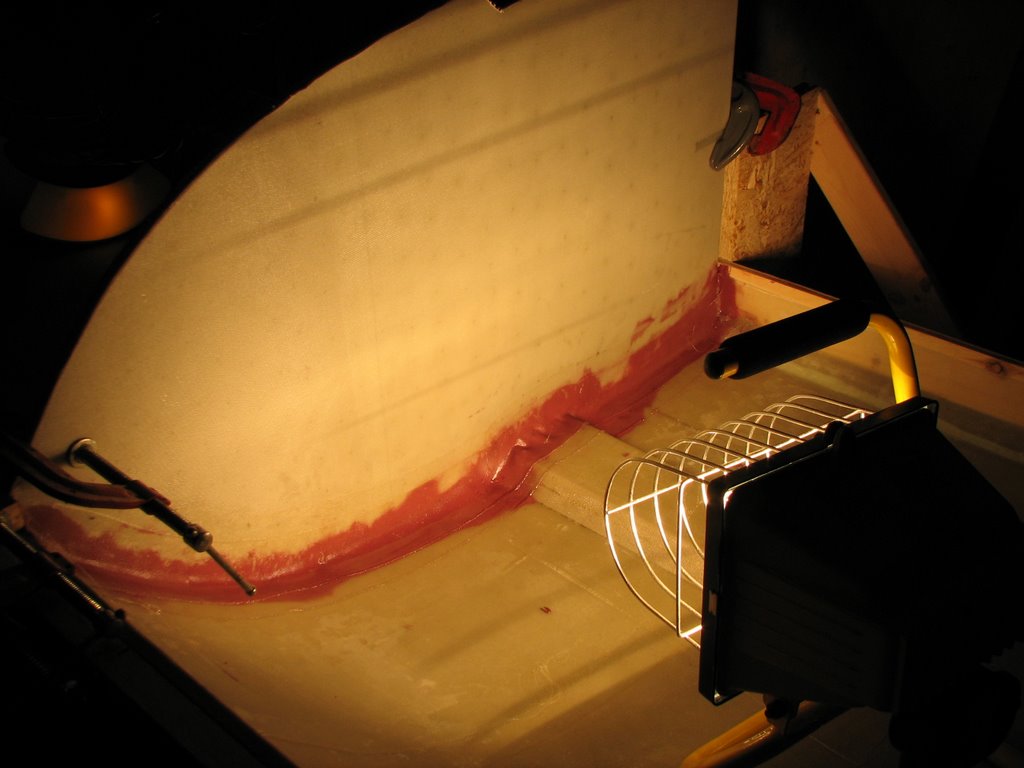
You can clearly see that the G10 thimble has been well seated in the putty and that I have the required thickness of wrapping tight around them.
I will wait to cut the slots for the deadeye hardware until I am more clear about those details.
Thursday, December 28, 2006
Chainplates now laminated with carbon fiber and cut
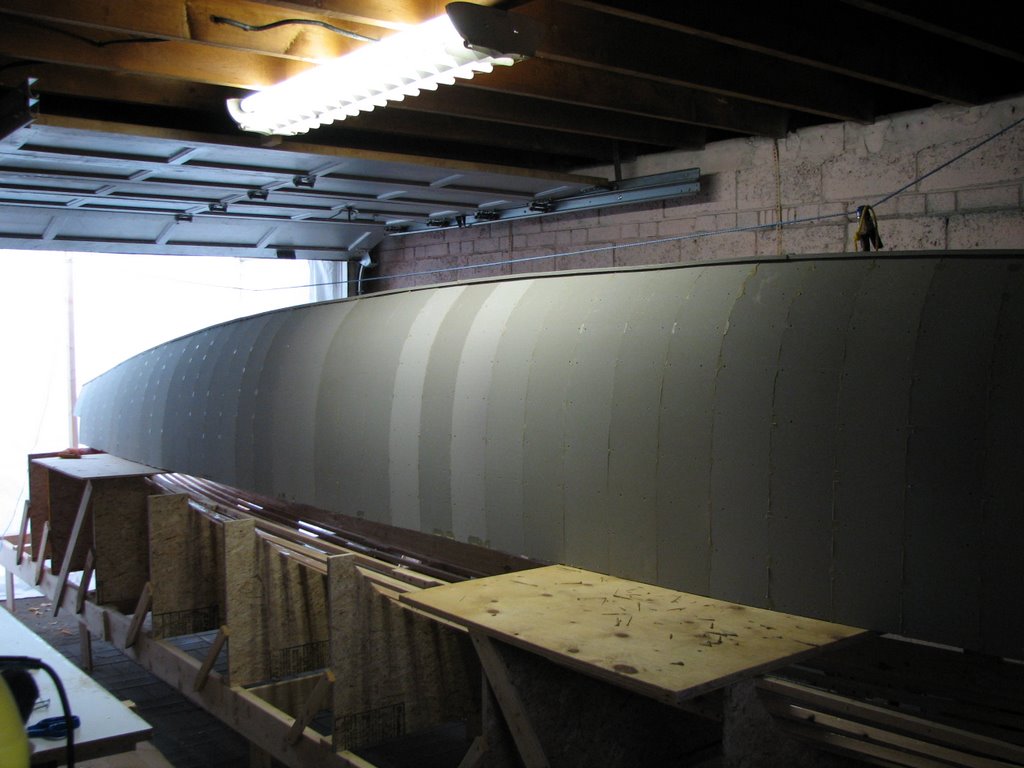
Sunday, December 24, 2006
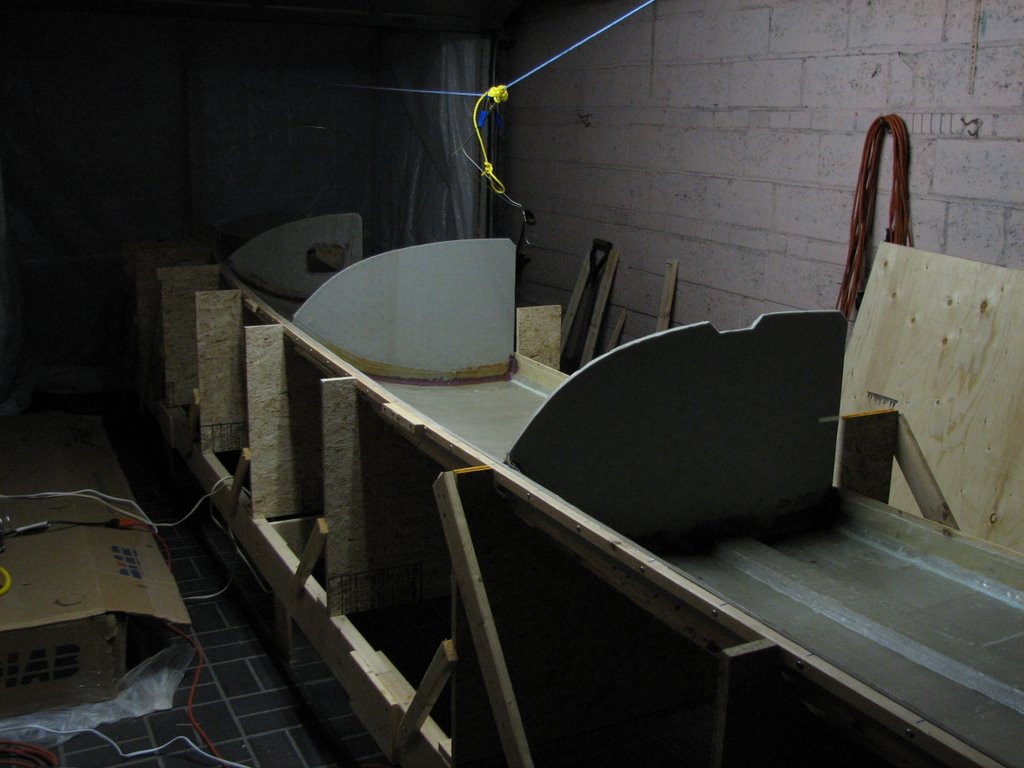
Starboard side inner float half stored for the winter


 This done, I plan to plank the next float half over the Christmas holiday break.
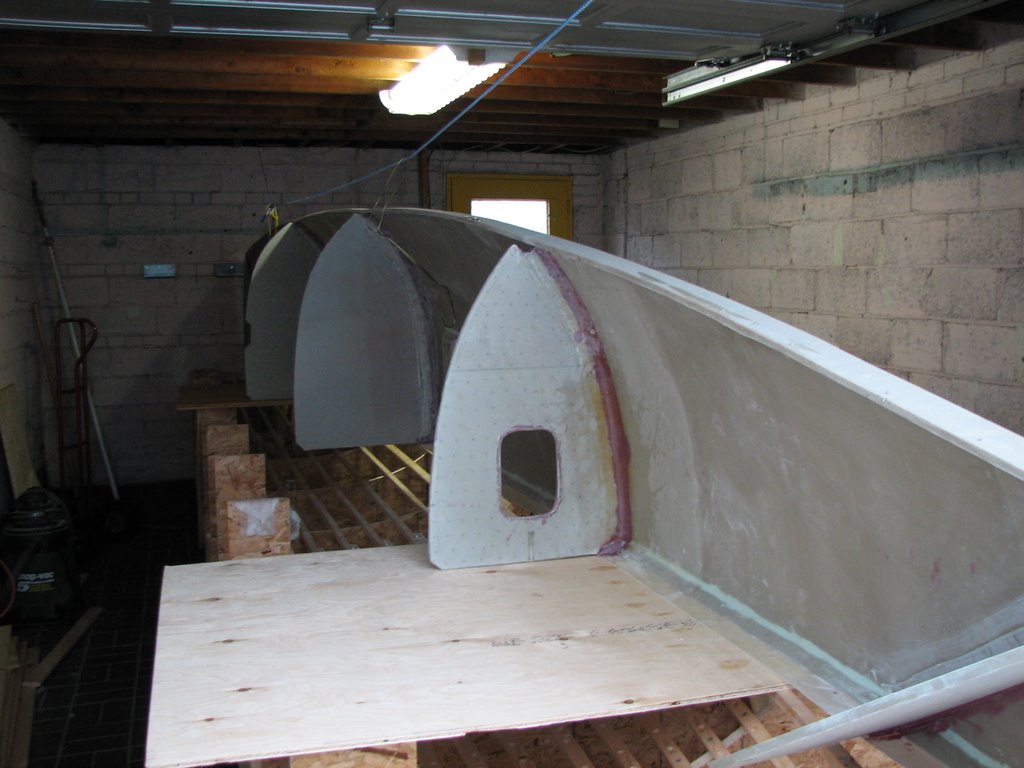
Sunday, December 10, 2006
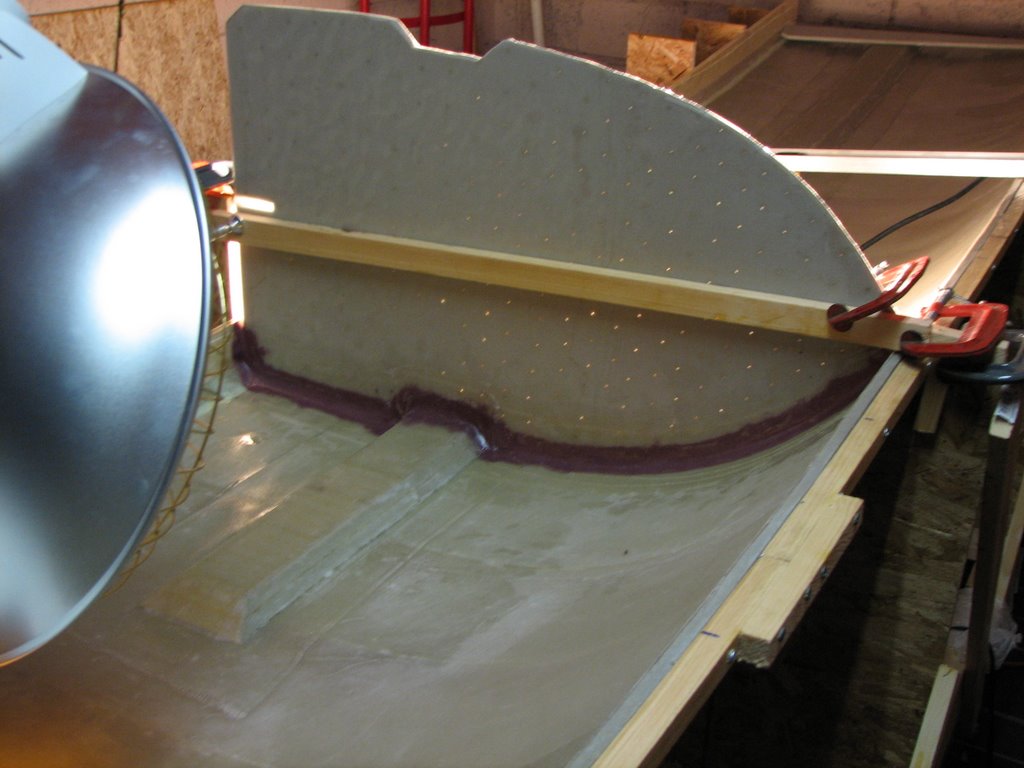
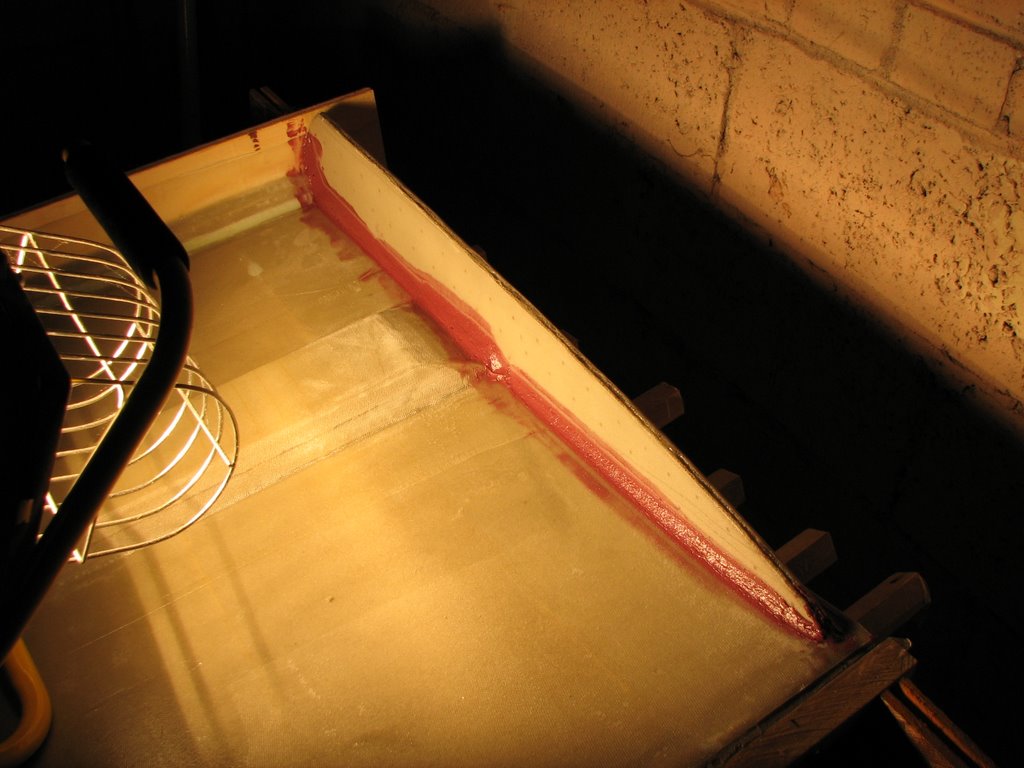
Starting the carbon fiber chain plate
 The design calls for 1 inch of epoxy putty that joins the foam core with the G10 fiberglass tube. I constructed a simple mold and mixed the putty (all micro balloons this time) so that it would still pour and carefully filled it up so that there would be no voids.
  I am pretty happy with the result. Next, I need to wrap it with the unidirectional carbon fiber and then cut it into the two required parts.
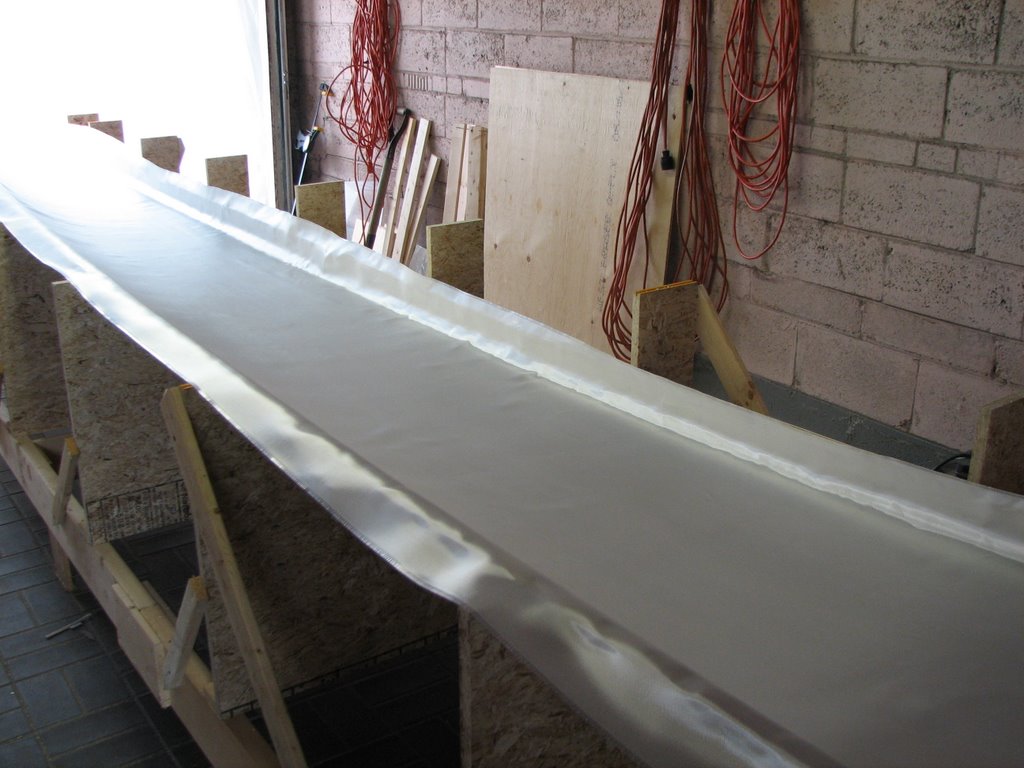
Float storage hutch in the back yard


Before too much snow arrives I thought it appropriate to build the shelter for the floats in the back yard. Here it is, all 21 feet in length, ready for the heavy duty plastic sheeting. Next summer this structure will become a hot house so that the epoxy gets the beneficial extra heat treatment.
Sunday, November 26, 2006
First float half out of the form frames
We removed all the screws holding the foam to the form frame battens. M, C and C all pitched in as getting underneath the float hull is not the easiest thing.
Then...
A big occasion, a milestone, the first float half out of the form frames!
It came out pretty easy, with a 'pop' on the keel side ... and ... with some extra work with a table knife to separate the deck flange - it was out!
Next, I have to make a safe place to store the part outside the obviously size challenged garage, so that I can start the next half.
Installing Chainplate Pad
I used 3 foam layers glued together from offcuts from the hull build to make the required pad thickness. The 45 degree sides were then cut with a table saw.
I made the required shape to fit to the hull by using a palm sander with 80 grit sandpaper.
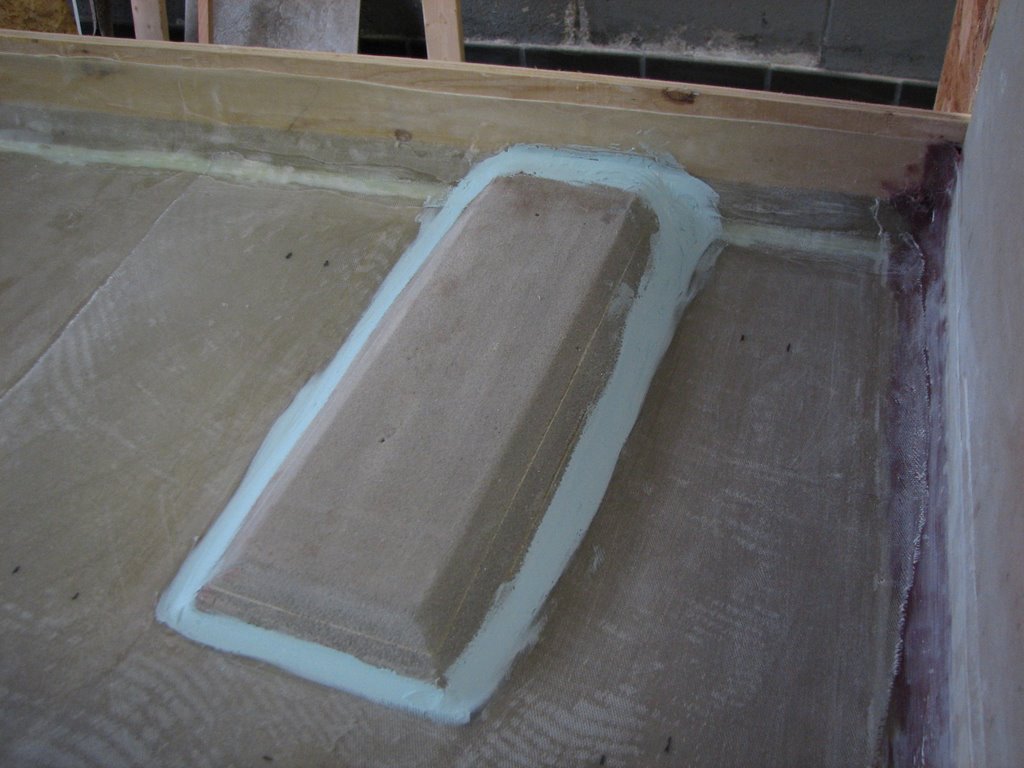
Here is the chainplate pad fitted into the hull and ready for two layers of the c spec. covering. I have used some Interlux watertite epoxy filler to smooth out the sharp edges and to make the laminating with the cloth easier.
Repairs

There was one area about 17 cm long on the bow stringer where the fabric was raised from the foam. I took the time to sand this area down, as pictured above, and then re-laminate with tape.
Tuesday, November 14, 2006
Installing the first bulkheads
This shows how the forward beam bulkhead with the resin putty and tape was clamped into place while things were hardening. The bulkheads are aligned with form frame positions making it possible to use the strong back structure to clamp it into position.
My available work time on the boat is becoming increasing available after dark with the winter shorter days and all. So...work is getting darker and colder. The garage is not heated and I am finding without the heaters the epoxy will not completely harden. I am careful to keep the focused heat rotated around the part so that no distortions occur.

I have used probably a 50-50 combination of cabosil (better for adhesion) and microballoons (easy to fair) in my mix of putty for the bulkheads.
My trusty Zenon lamp that supplies heat and light.
A float half taking on more 3 dimensional volume.
Here is the small bow bulkhead just after installing with the putty. You can see the generous putty bead (aft side only) that the designer calls for.
Here is the small bow bulkhead just after installing with the putty. You can see the generous putty bead (aft side only) that the designer calls for.
Wednesday, November 08, 2006
Float bulkheads and vacuum bagging

Here is the small forward bulkhead carefully cut and laid out on the vacuum bagging table with the various laminate materials required for vacuum bagging. I would always take the time to work clean here and be totally organized (have everything cut to size and be handy) before mixing the epoxy resin. I have also put a number of coats of parting wax everywhere on the table top before starting. The masking tape will keep the area where you will be sealing the bag clean from epoxy spills.
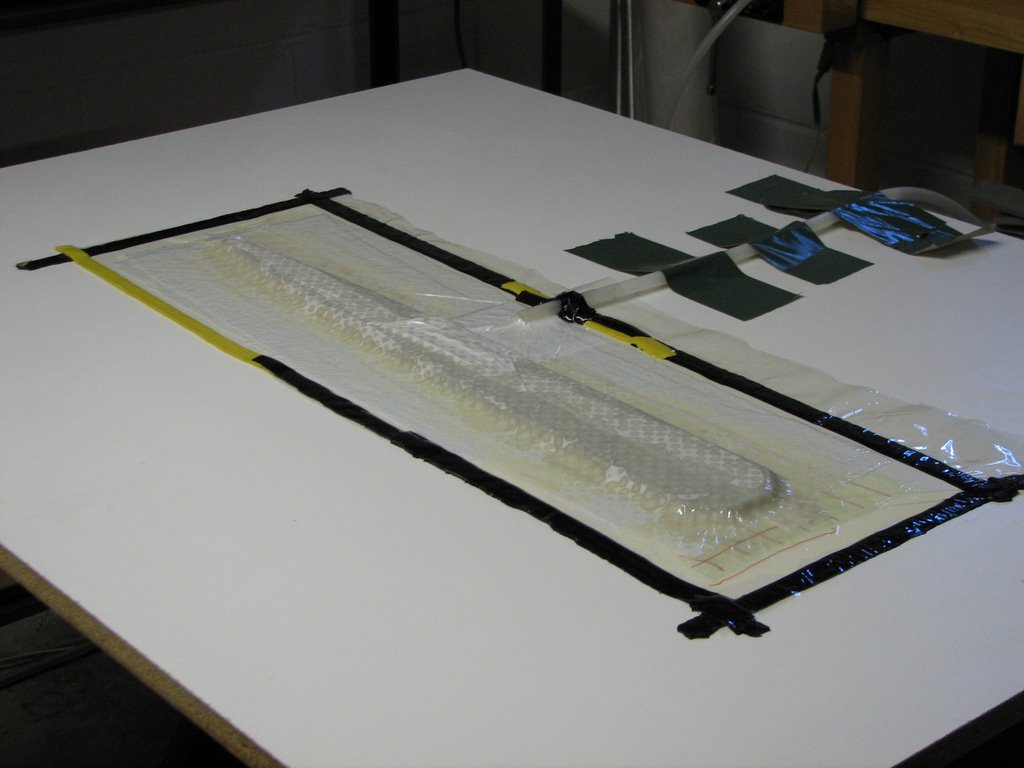
Here is the part now under vacuum. There are quite a number of layers in this 'vacuum sandwich'.
- Waxed table top
- Peel ply
- Fiberglass cloth
- Perforated foam
- Fiberglass cloth
- Peel ply
- Release fabric
- Breather material
- Vacuum bag

Here you can see the breather material pulled away after hardening. You can see it is saturated in the excess unwanted epoxy resin. I was amazed at how much is actually removed from the composite part.

As you can see I did not have a problem achieving a good vacuum. -29 in Hg is about the best you can do. I actually have a 1/2 HP vacuum pump since I want to 'bag' much larger areas later on.
The best part of these early attempts is that I found I could isolate the part with a valve, turn off the pump for up to 15 minutes without loosing too much vacuum (better than-25 in Hg).
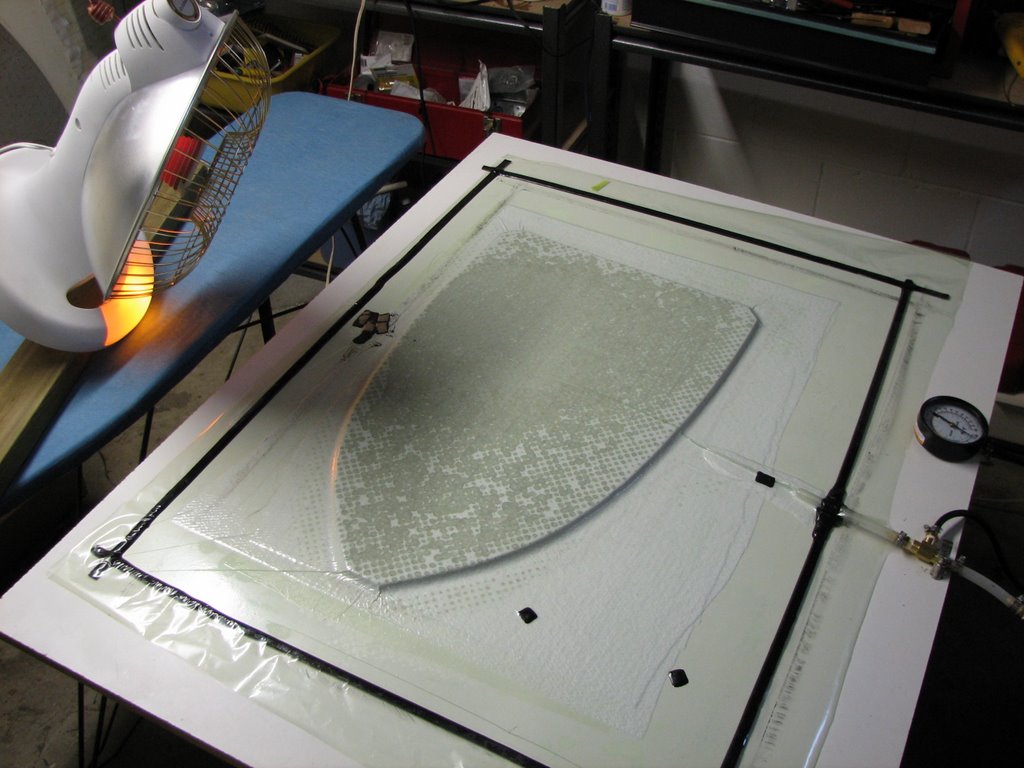
Here is the larger centre bulkhead under vacuum. You can see how I would apply extra heat with an infra red lamp (from Costco) to speed up the epoxy hardening.
Friday, November 03, 2006
First float lamination - Late September 2006
First port side float half with the laminate laid out dry and ready for the epoxy resin.
I started out with the idea to make a light but strong boat and the choice in materials seemed to me to be a very important matter. So, I researched the matter, as is my habit, in a fairly thorough manner. I also had a long series of conversations with my local supplier, before I actually bought supplies. I ended up choosing an s-glass woven cloth from BGF. It is 8.9 oz and satisfies Ian Farriers specification for the 'B-side' specification for a F-22R version of the trimaran. That's R for racing (and R for Raven) and a little more on the edge. Ian Farrier has recently estimated a theoretical (best case) target weight of ~112 lbs for a complete float without the paint. I'll be curious to see how I do.I did consider resin infusion techniques to optimize the epoxy to cloth weight ratio's, but in the end I have decided that the 'one-off' techniques used in the Farrier 22 plans do not favour this process. My current goal is to explore vacuum bagging the laminations on the hulls exteriors.

First float lamination complete
I have chosen to use a quality aerospace epoxy manufactured by PTM&W Industries called Aeropoxy with a 2 hour working time hardener. For this job I enlisted M's help and we learned a lot about getting the cloth whetted out and free of air bubbles. You can see the foam stringer in the bow area that is ready for final positioning and laminating into place.
More soon about vacuum bagging the bulkheads.
Thursday, November 02, 2006
Strong back, form frames, battens and planking - July through September, 2006
First a little bit of history, the build started seriously in mid-July with the construction of the strong back and the form frames for the floats. I was thinking of having the forms CNC cut and acquired the dxf files from Ian Farrier, but in the end the patterns were simple enough to hand trace and then cut out with the jig saw. I did however have the metre wide form frames cut accurately to size and square at my local Home Depot. When it comes to the form frames for the main hull I will reconsider CNC cutting.

The battens that will support the vertical stripped foam and the deck flange mold plate were next.
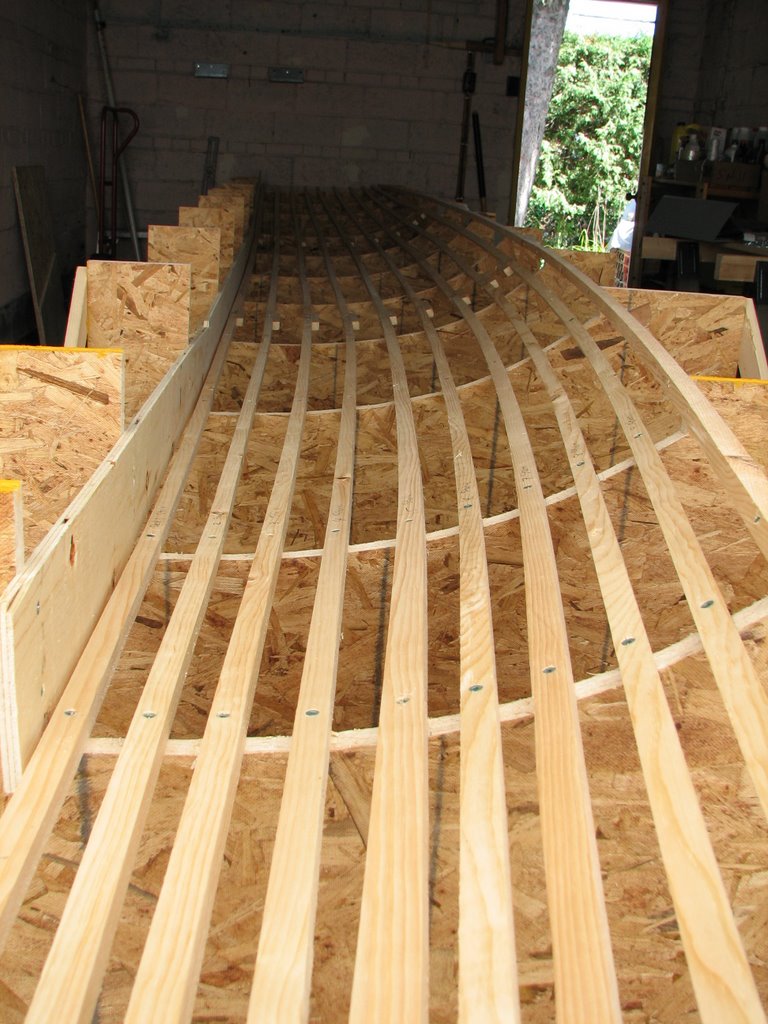
Then the foam planking began. I used the improved Divinycell H grade 5lb/ft3 structural foam core from DIAB. First the foam strip on the keel.

And then, all the foam planking was laid down. It didn't take too long to get it all done. There are a 'heck of a lot' of screws holding the foam down through the battens from the outside, so, there is good reason to build the strong back at a decent working height!

I chose to edge glue all the foam strips with a moisture curing polyurethane construction adhesive. It's easy to cut the excess glue away with a knife.
More historical updates soon.
Subscribe to:
Comments (Atom)


