
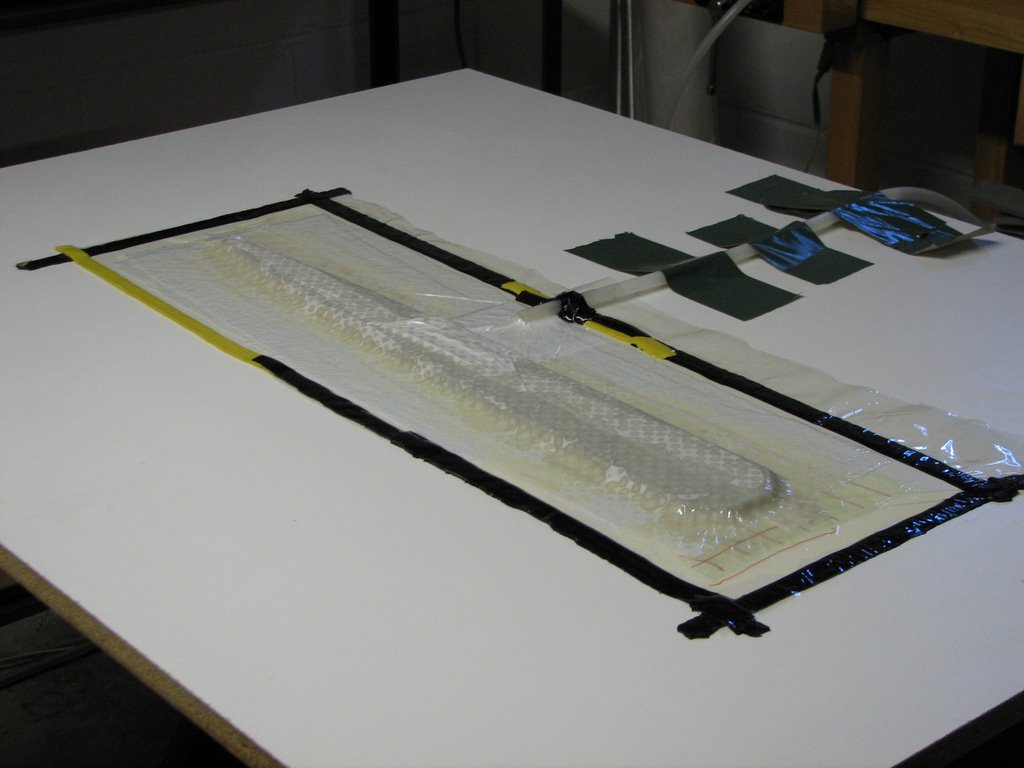
Here is the small forward bulkhead carefully cut and laid out on the vacuum bagging table with the various laminate materials required for vacuum bagging. I would always take the time to work clean here and be totally organized (have everything cut to size and be handy) before mixing the epoxy resin. I have also put a number of coats of parting wax everywhere on the table top before starting. The masking tape will keep the area where you will be sealing the bag clean from epoxy spills.
Here is the part now under vacuum. There are quite a number of layers in this 'vacuum sandwich'.
- Waxed table top
- Peel ply
- Fiberglass cloth
- Perforated foam
- Fiberglass cloth
- Peel ply
- Release fabric
- Breather material
- Vacuum bag

Here you can see the breather material pulled away after hardening. You can see it is saturated in the excess unwanted epoxy resin. I was amazed at how much is actually removed from the composite part.

As you can see I did not have a problem achieving a good vacuum. -29 in Hg is about the best you can do. I actually have a 1/2 HP vacuum pump since I want to 'bag' much larger areas later on.
The best part of these early attempts is that I found I could isolate the part with a valve, turn off the pump for up to 15 minutes without loosing too much vacuum (better than-25 in Hg).
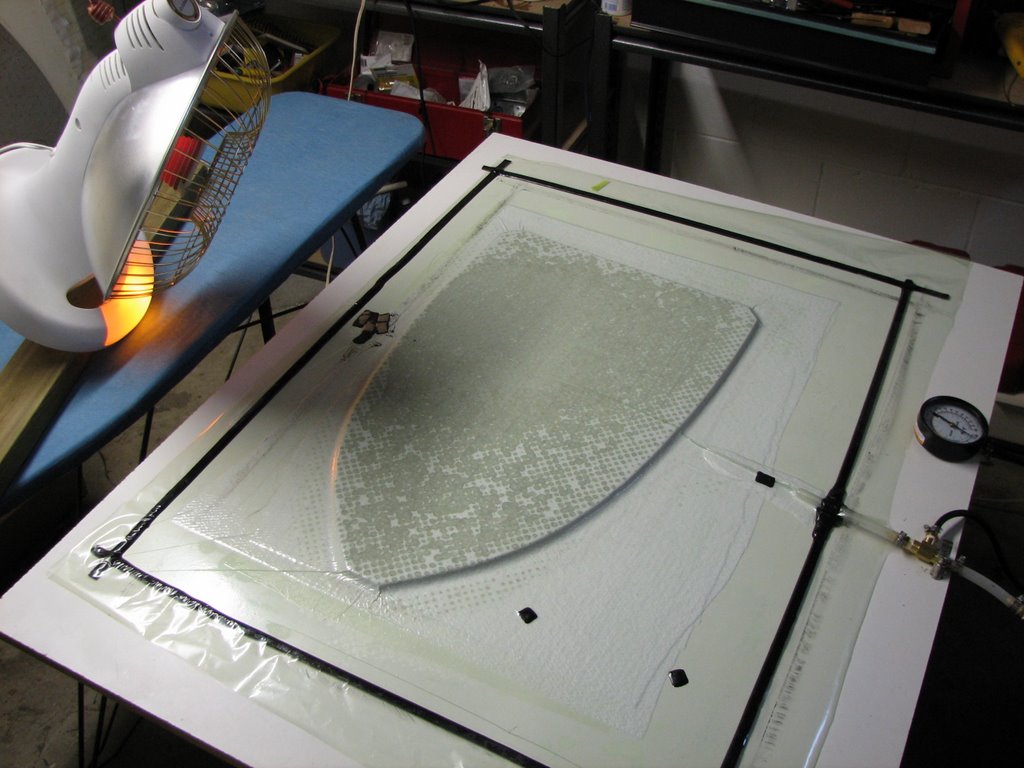
Here is the larger centre bulkhead under vacuum. You can see how I would apply extra heat with an infra red lamp (from Costco) to speed up the epoxy hardening.


No comments:
Post a Comment